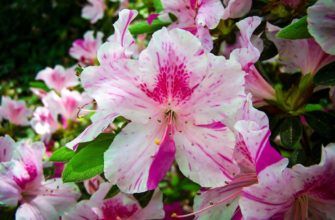
Growing hydrangea, it is important to know about how to properly care for the flower.
The need and order of preparation of the garden bush depends on:
- climatic characteristics of the area;
- varietal winter hardiness;
- plant age.
Gardening should be done with the above factors in mind. Choosing the right method of covering affects the well-being of overwintering hydrangeas.
How to properly prepare hydrangeas for wintering
Not every garden plant is capable of surviving the winter season on its own. Hydrangea winter hardiness increases with age. Annual shrubs are always insulated for the winter because their root systems are most vulnerable.
Improper warming leads to these consequences:
- Delayed vegetation;
- lack of blooming;
- Death of a specimen.
Knowing how to prepare hydrangeas for winter, you can avoid negative consequences and enjoy abundant blooms of the queen of the garden. Preparation of hydrangeas for winter begins in early fall.
From the beginning of September, stop fertilizing, watering is reduced to a minimum.
With the onset of leaf fall, the plant is freed from the foliage to accelerate the outflow of nutrients to the roots. Fallen leaves must be removed. The top layer of soil is loosened to a depth of five to seven centimeters. This will help to get rid of garden pests, improve soil aeration, and create a thermally insulating “air cushion”.
Do Hydrangeas need to be trimmed for the winter?

Pruning the above-ground part has a number of rules, compliance with which will help to avoid fatal mistakes. Garden work is carried out with the onset of the first frost. Mandatory pruning is shown only to one- or two-year-old shrubs. The above-ground part should be removed almost completely, leaving 10-15 centimeters.
Most gardeners prune shrubs, for more comfortable work on transplanting, sheltering. It is necessary to take into account the variety and age of the plant, so as not to deprive it of the opportunity to flower in the future season. You can safely cut varieties, throwing flower stalks on one-year shoots.
Hydrangeas which flower buds develop on the previous year’s shoots should not be cut back. These bushes are best trimmed in spring.
Pruning is the final stage of preparation that is carried out before the hydrangea is covered for the winter.
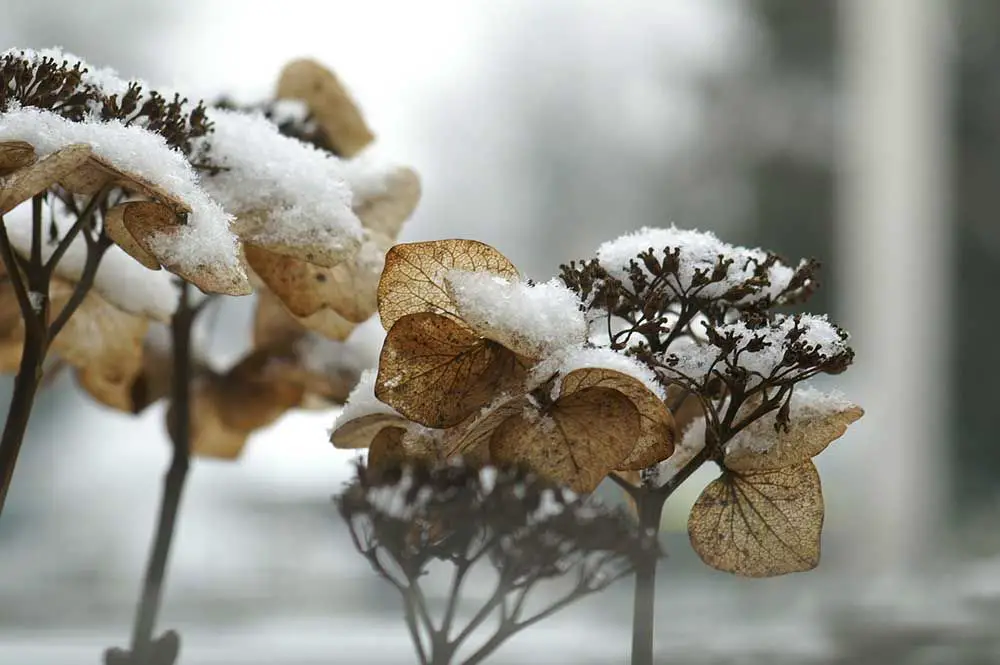
When to cover hydrangeas for the winter
The garden insulation should be started after the establishment of stable frosts. In temperate climates, the “Indian summer” ends in early to mid-October. Evidence of a stable frost is the complete shedding of leaves by garden and park trees. At this time, the final gardening work begins.
Beforehand, it is necessary to prepare consumables, the list of which may vary depending on the method of insulation and local traditions.
Most gardeners use:
- Garden soil, sand, sawdust;
- Dry leaves from park trees;
- Spruce lapnik, pine needles;
- Boards, wooden crates, wicker baskets;
- Polyethylene, burlap, lutrasil, ruberoid, agrospan.
You will also need: wire, duct tape, twine, rocks or bricks.
How to cover Hydrangeas for winter
Hydrangeas are covered for the winter in two stages. Measures to insulate the root system and the above-ground part of the plant differ in method and materials used. Young hydrangeas “dress” warmer than adult bushes. Older plants are insulated only in areas with harsh winters.
Five-year-old hydrangeas can safely handle a long fall in temperature to -25 °C.
Protect the roots with an additional layer of earth, pine needles, sawdust or sand. It is required to arrange a mound of three to five buckets of loose material. The mound can be lightly compacted by hand. Poisonous food for small rodents is placed in the rosette of branches. After that, proceed to the troubles with the above-ground part.
There are several ways to protect the branching part of the plant:
- Horizontal or ground;
- Vertical or staked.
The first method is considered less costly, although it requires more effort. The second method is more suitable for areas with heavy snowfall. Which option is best suited depends on the age of the hydrangea and the local climate. Horizontal insulation requires the top part of the plant to be in an upright position.
Hydrangeas are very flexible branches, and do not break when bent. It is extremely important to bend them gently towards the ground without using brute force. The branches are fixed in a horizontal position with wire clips, planks, stones or bricks. Some gardeners gather the bush into a bundle, loosely tying it with string, which is already attached to a board.
Mature hydrangeas growing in temperate gardens are sufficiently high up.
Measures to insulate garden plants are to create layers of different materials with certain properties. The first layer should always consist of loose, breathable material. It is followed by a waterproofing material that prevents it from getting wet. The formation of an ice crust on the branches is highly undesirable. Thermal insulation materials are used for the last, third layer.
The main rules of horizontal insulation
The horizontal method of insulation boils down to the following rules:
- Branches of young hydrangeas are laid only on the pre-laid ground. Bedding is constructed of dry leaves, straw, lapnik, needles. The material should be dry with no signs of mildew.
- On top arrange a warm cushion of bedding material. This way the branches of the shrub are inside the loose material, which is free to let air in, eliminating the formation of mold.
- Waterproofing layer is arranged from polyethylene or similar materials. The coverage area should be slightly larger than the size of the loose layer. The edges of the film are fixed with long boards, stones or bricks. This layer will protect the branches and the loose layer from getting wet during cold rains or thaws.
- Finally, the structure is covered with burlap, thermoplastic. Many gardeners use pieces of old mats, rugs to create an additional layer of insulation.
In anticipation of cracking frosts, you can additionally insulate hydrangeas by throwing more snow on them.
Vertical insulation of hydrangeas for the winter
A vertical structure is used to insulate old shrubs. It is also appropriate to resort to such a construction if the climate is characterized by harsh winters with heavy snowfall. Hydrangea can “suffocate” under too thick a layer of snow and vertical insulation will eliminate the undesirable scenario of wintering.
A feature of vertical insulation is the construction of a framework around the bush.
Actions are carried out in the following order:
- The branches are tied together beforehand, but not ducked to the ground.
- The ground is covered with a layer of spruce needles or pine needles to discourage rodents. Poisoned food is also placed.
- Place metal mesh or old crates around the plant to form an enclosed perimeter. Plastic containers from under vegetables can be used. Some gardeners construct a woven frame from flexible branches, wire.
- The inner space is filled to the top with dry leaves, straw, lapnik, sawdust. Periodically loose material is slightly kneaded.
- Cover the outer surface of the frame with polyethylene or other waterproofing material. The film also covers the top of the “bollard”.
The final layer is constructed from roofing felt, old bags, mats or reed mats.
When to remove the insulation from garden plants
Inexperienced gardeners often rush to start gardening on the first few days of weather and make a huge mistake. Hydrangeas should not be exposed to the risk of a return frost. It is much safer to gradually release the shrub from its protective covering.
It is extremely important to clear the insulated mound of snow during the thaw to avoid the formation of an airtight mound.
Remove the burlap and polythene if night frosts do not fall below -10°C for one or two weeks.